‘Mind the Gap’ – Multi-Technology Robotic Sensor
【Introduction】 ZEISS AIMax digital-optical 3D sensor is the new benchmark in robot-based 3D inline metrology for sheet metal processing
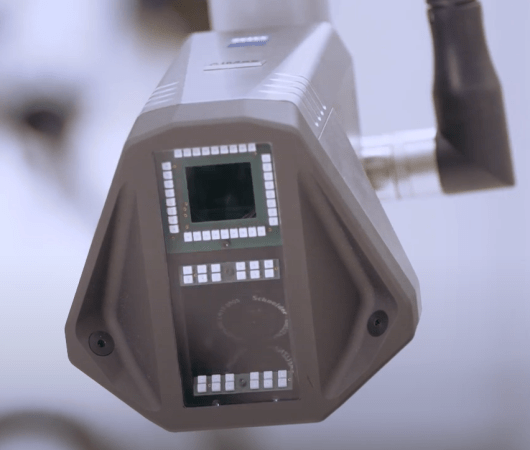
The ZEISS AIMax digital-optical 3D sensor is the new benchmark in robot-based 3D inline metrology for sheet metal processing and car body construction. The unique combination of three measuring principles in one compact sensor enables the measurement of complex geometric characteristics such as holes, bolts, and gap and flush with maximum robustness, as well as attributive characteristic recognition.
AIMax offers a unique combination of three measuring principles in one sensor for grayscale image processing, multi-line laser triangulation, and shadow analysis. Using digital (GigE) camera technology with signal lines up to 100 m the sensor offers high resolution for increased measuring accuracy with fast measuring speeds for characteristic analysis. Flexible illumination control for optimal illumination offers individually switchable segment illumination and combinations to generate ideal contrast of difficult-to-measure features.

Measuring time <0.1 to 0.5 seconds/measuring position. Typical sensor measuring time depends on the number of photos taken and illumination used. The typical measuring time, including robot movement, is 1.8 to 3.0 seconds/ measuring position depending on the robot type and the measuring position on the part.
Its short measuring times make the Zeiss AIMax ideal for 100% inspections with short cycle times. The compact sensor design permits the measurement even of hard-to-reach features, making it ideal for robot-guided usage in inline metrology.
The optimized sensor design also allows for the measurement of features with an inclined sensor (not normal-to-metal).

Early detection of gap and flush values can prevent the need for extensive and costly subsequent reworking in automotive plants. Cross-facility, in-line performance tests not only have a positive impact on the subsequent tightness of the vehicle and ensure correct door closing forces, but also enhance the customer‘s driving experience by reducing driving noise. Various factors which can influence the dimensional stability of the vehicle hang-on parts such as temperature fluctuations, tension release, vibrations, mechanical and chemical processes, result in process influences throughout the entire production process. 100% inspection of the gap and flush values therefore is an indispensable tool for the control of the vehicle production process.


